Basic Wiring Techniques
It may seem like a fiddly and time-consuming task but once you have mastered the art of wiring and taping flowers with these Basic Wiring Techniques, you will be able to create a multitude of floral pieces.
Wiring adds strength to delicate stems, locks in the moisture so accessory items (like flowercrowns, corsages and boutonnieres) stay fresh longer and allows you to control each component of your floral design.
A little bit of practice is all it takes.
You will need:
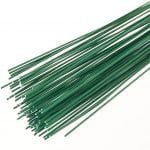
- Florist wire
- Florist tape
- Flower snips
Florist Wire
Floristry wires come in a variety of thicknesses known as gauge – the higher the gauge number the stronger the wire, which must be considered carefully when wiring flowers. Choose a wire, which will support the flower adequately without damaging the flower or stems.
Floristry Tape
The use of a floral tape is essential for wiring work. Not only does it cover the wire to makes stems look neat and tidy but also it helps prevent moisture loss from each flower. You can use Parafilm, which is a plastic tape, or a paper based tape like EcoPaper (available from florist suppliers and Spotlight). They both come in a variety of colors but green is the most common.
Flower Snips
Having the right tool for the job is always a good thing and a good set of Snips (or shears) when it comes to wiring and taping is no exception. Your snips will cut through the florist wire with ease so there’s no need for additional wire cutters.
While Flower snips work similarly to garden secateurs in that they are spring loaded, their blades are thinner and straight with a finer tip.
The Stitch Method 0.5 – 0.7 Gauge Wire
- Cut the stem about 1cm from the leaf.
- With the underside of the leaf facing you, pierce and thread the wire through either side of the spine.
- Bend both sides of the wire down to meet the stem.
- Stretch and wind the floral tape over the wire and leaf stem tightly.
(Used for leaves such as Magnolia, Camelia, Ivy and Laurel)

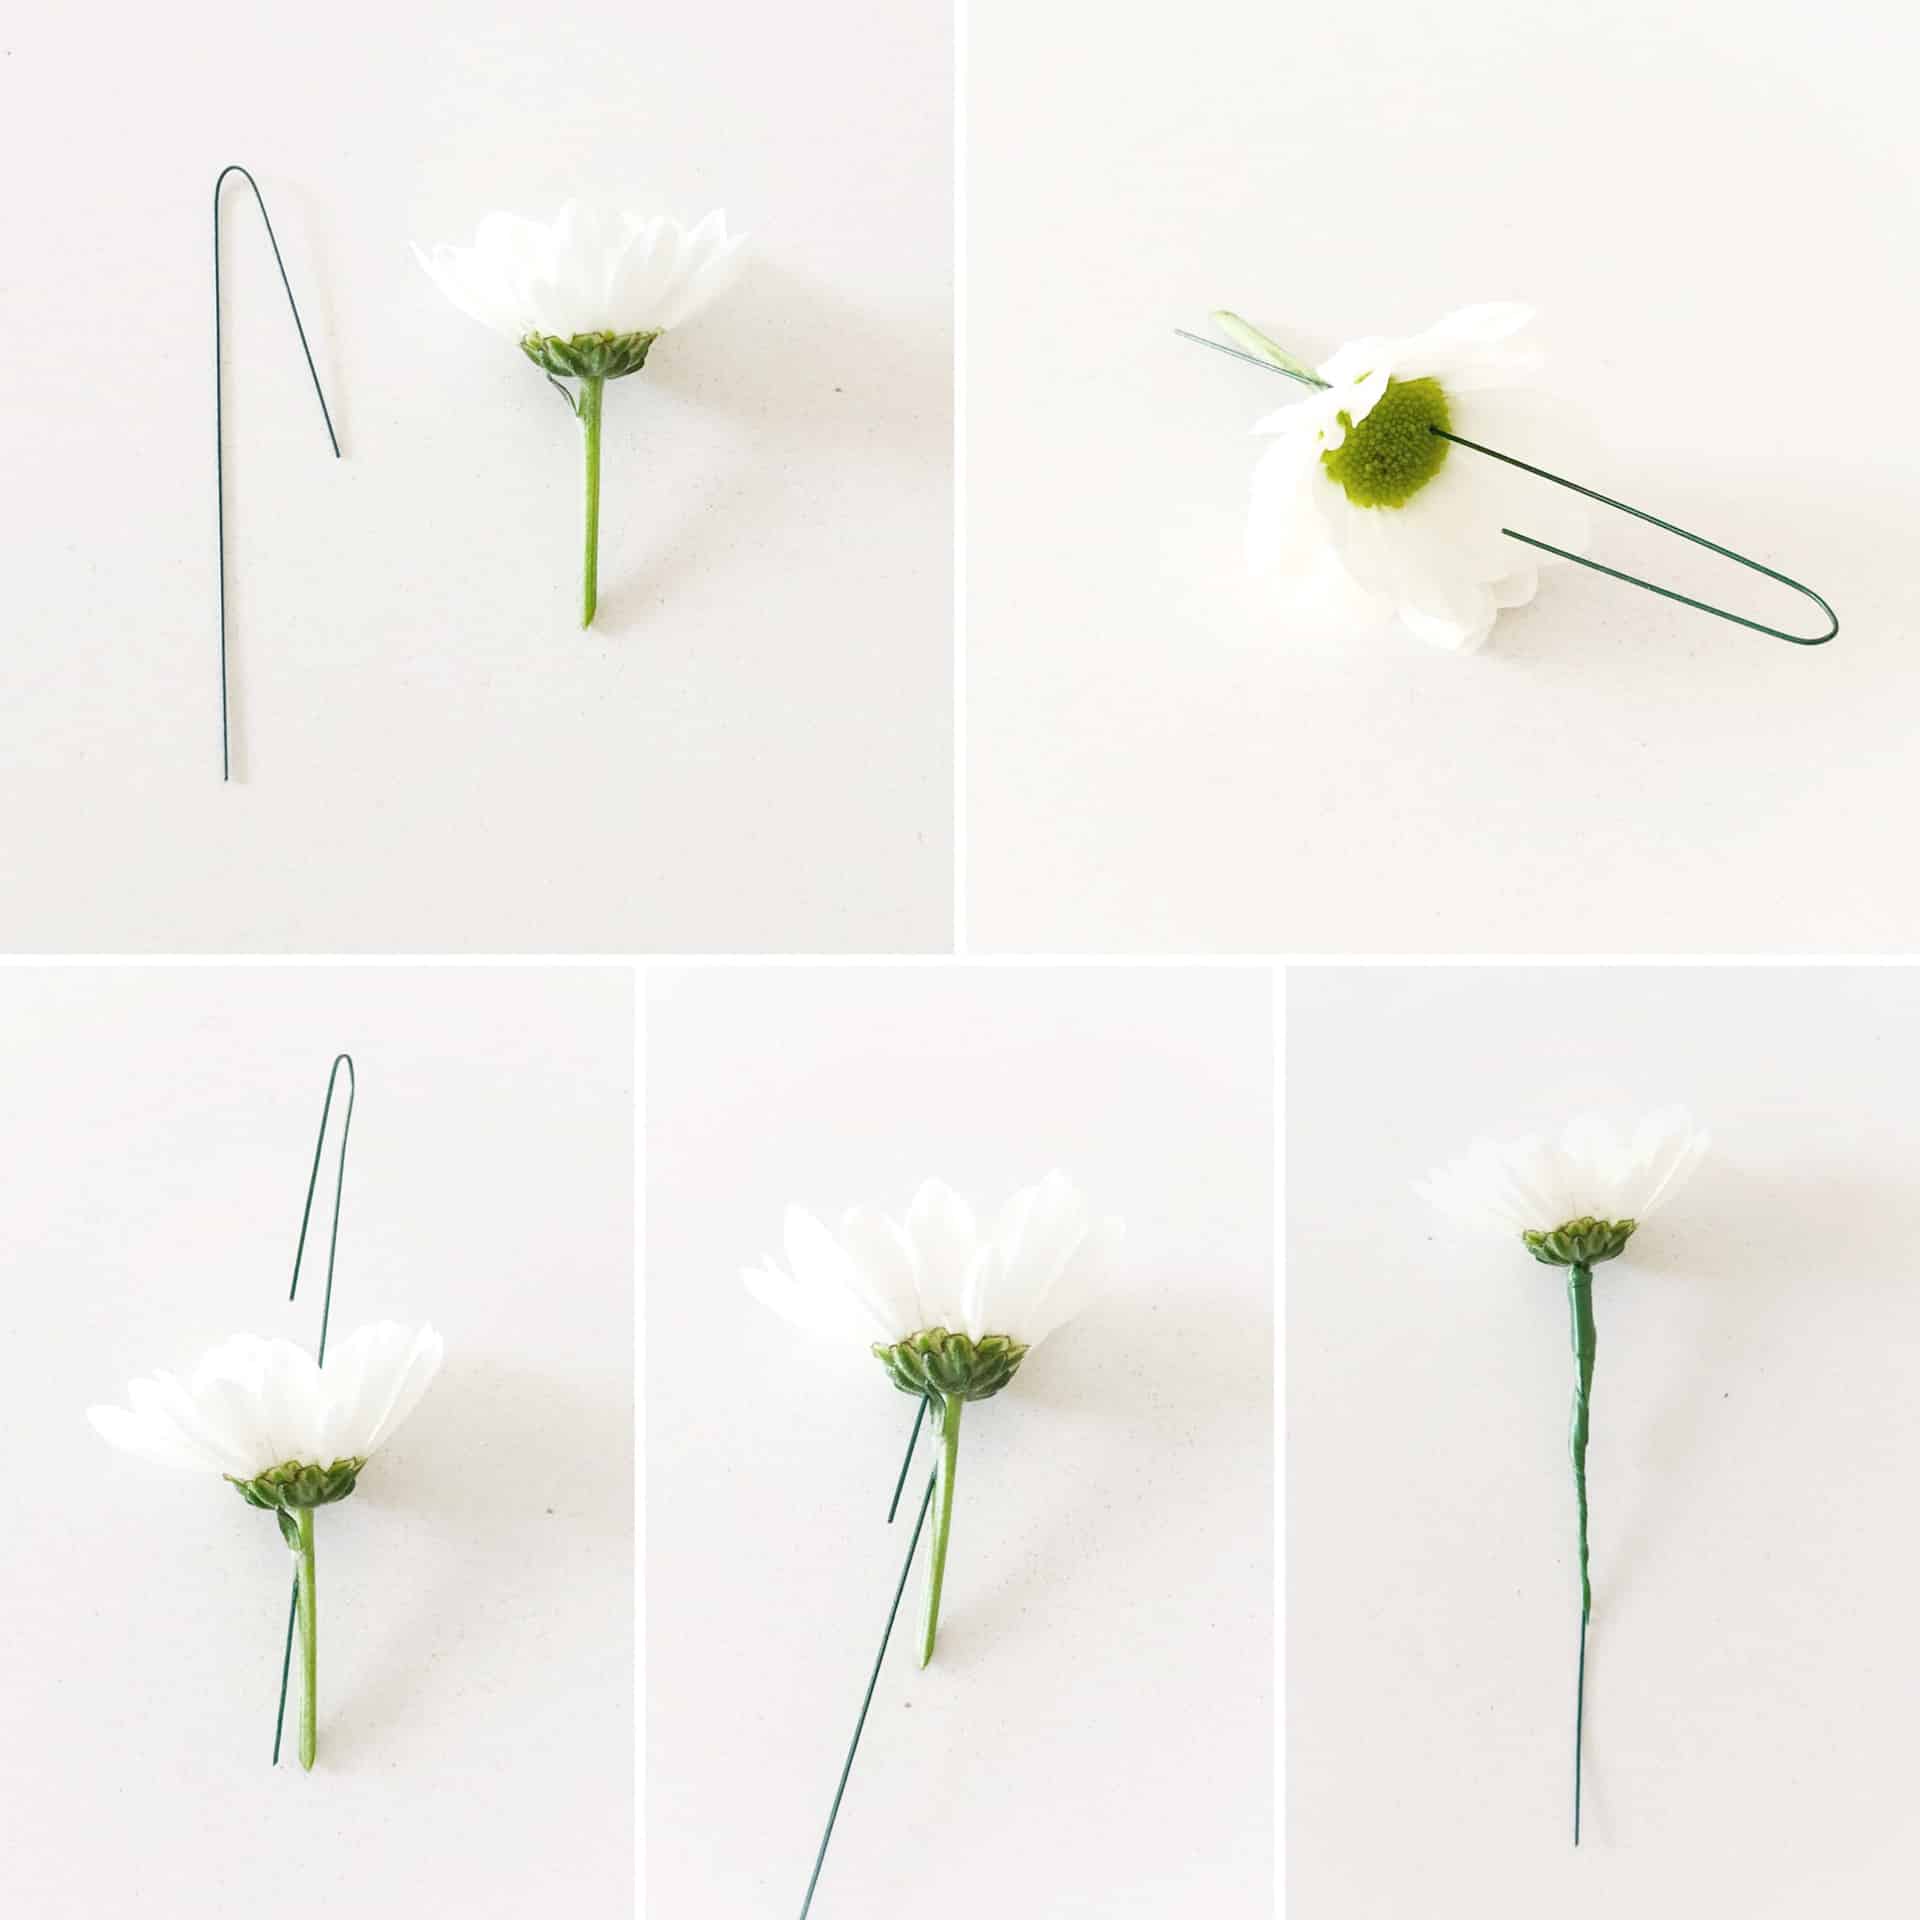
The Hairpin Method 0.5 Gauge Wire
- Cut the stem of the flower about 1cm from the head.
- Bend a length of wire into a hairpin shape.
- Thread both ends through the centre of the flower, piercing either side of the calyx. Keep pulling the wire though so that the curve of the wire is just embedded.
- Stretch and wind the floral tape over the wire and flower stem tightly.
(Used for individual delicate florets such as Orchids and Hyacinth)
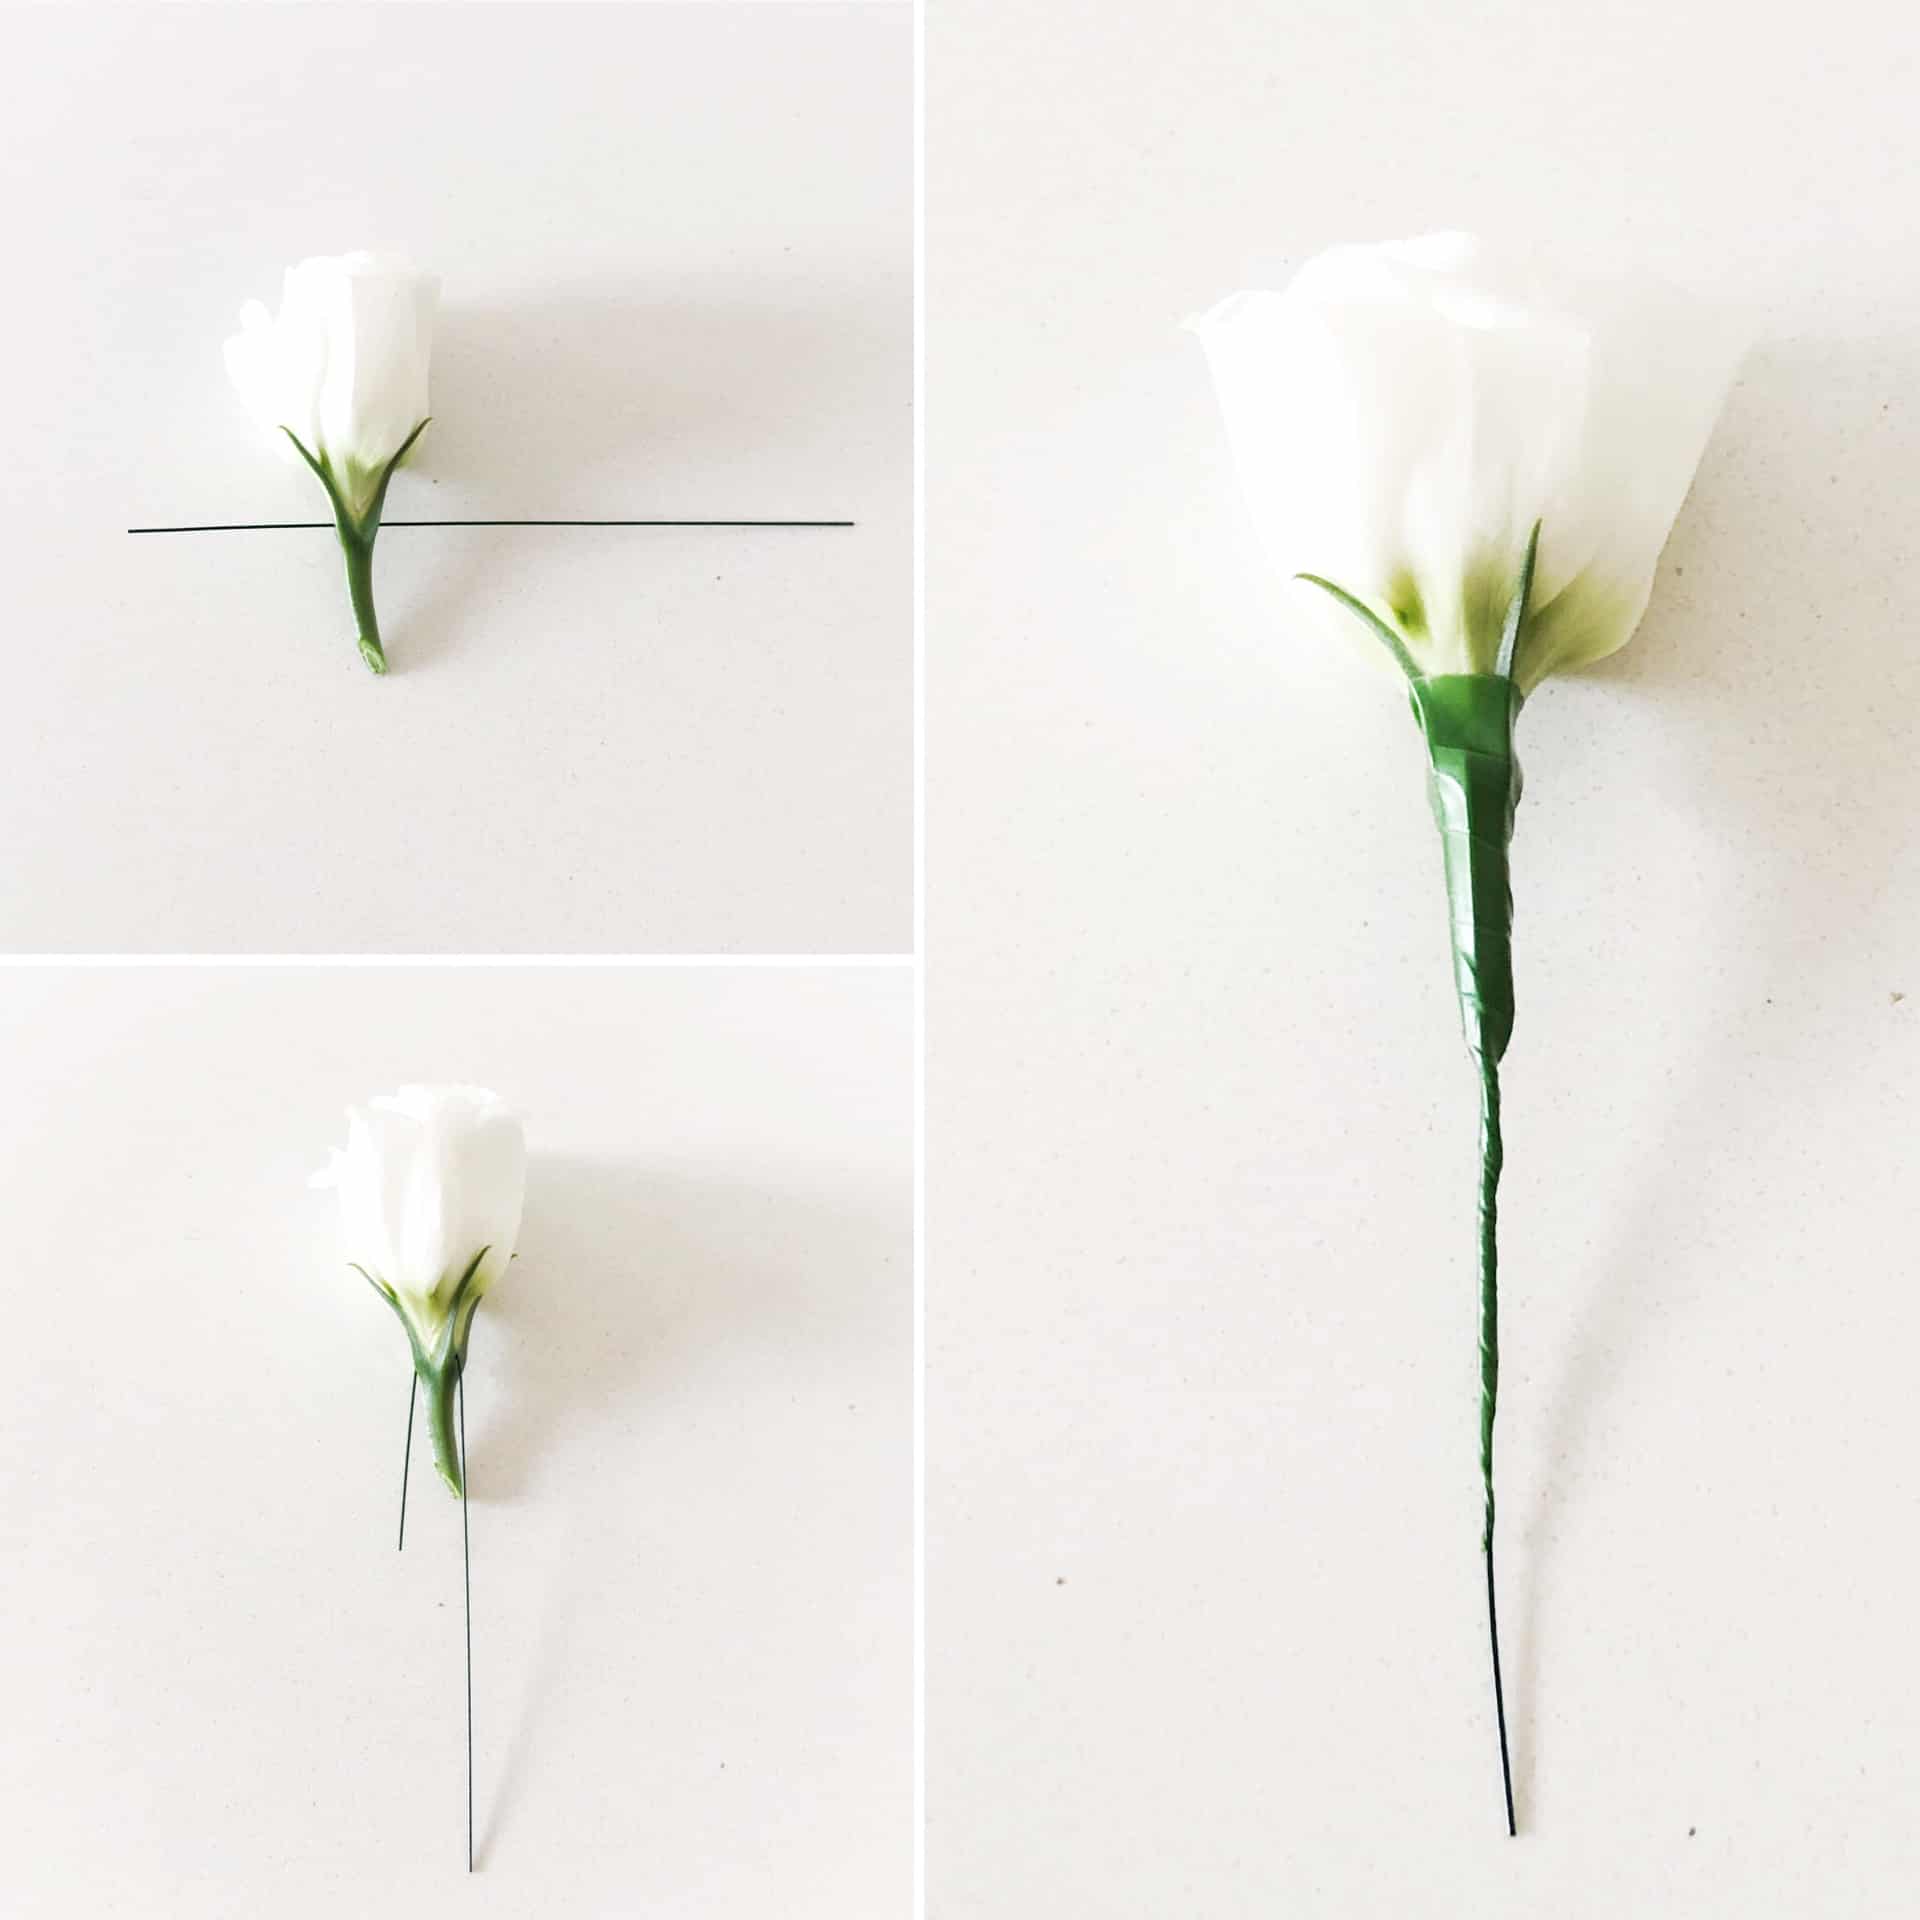
The Piercing Method 0.5 – 0.7 Gauge Wire
- Cut the stem about 1cm from the head
- Pierce the flower base with the tip of the wire and thread approximately 1/3 of the wire through it.
- Bend both sides of the wire down to meet the stem.
- Stretch and wind the floral tape over the wire and leaf stem tightly.
(Used for Roses, Carnations, Lisianthus etc)
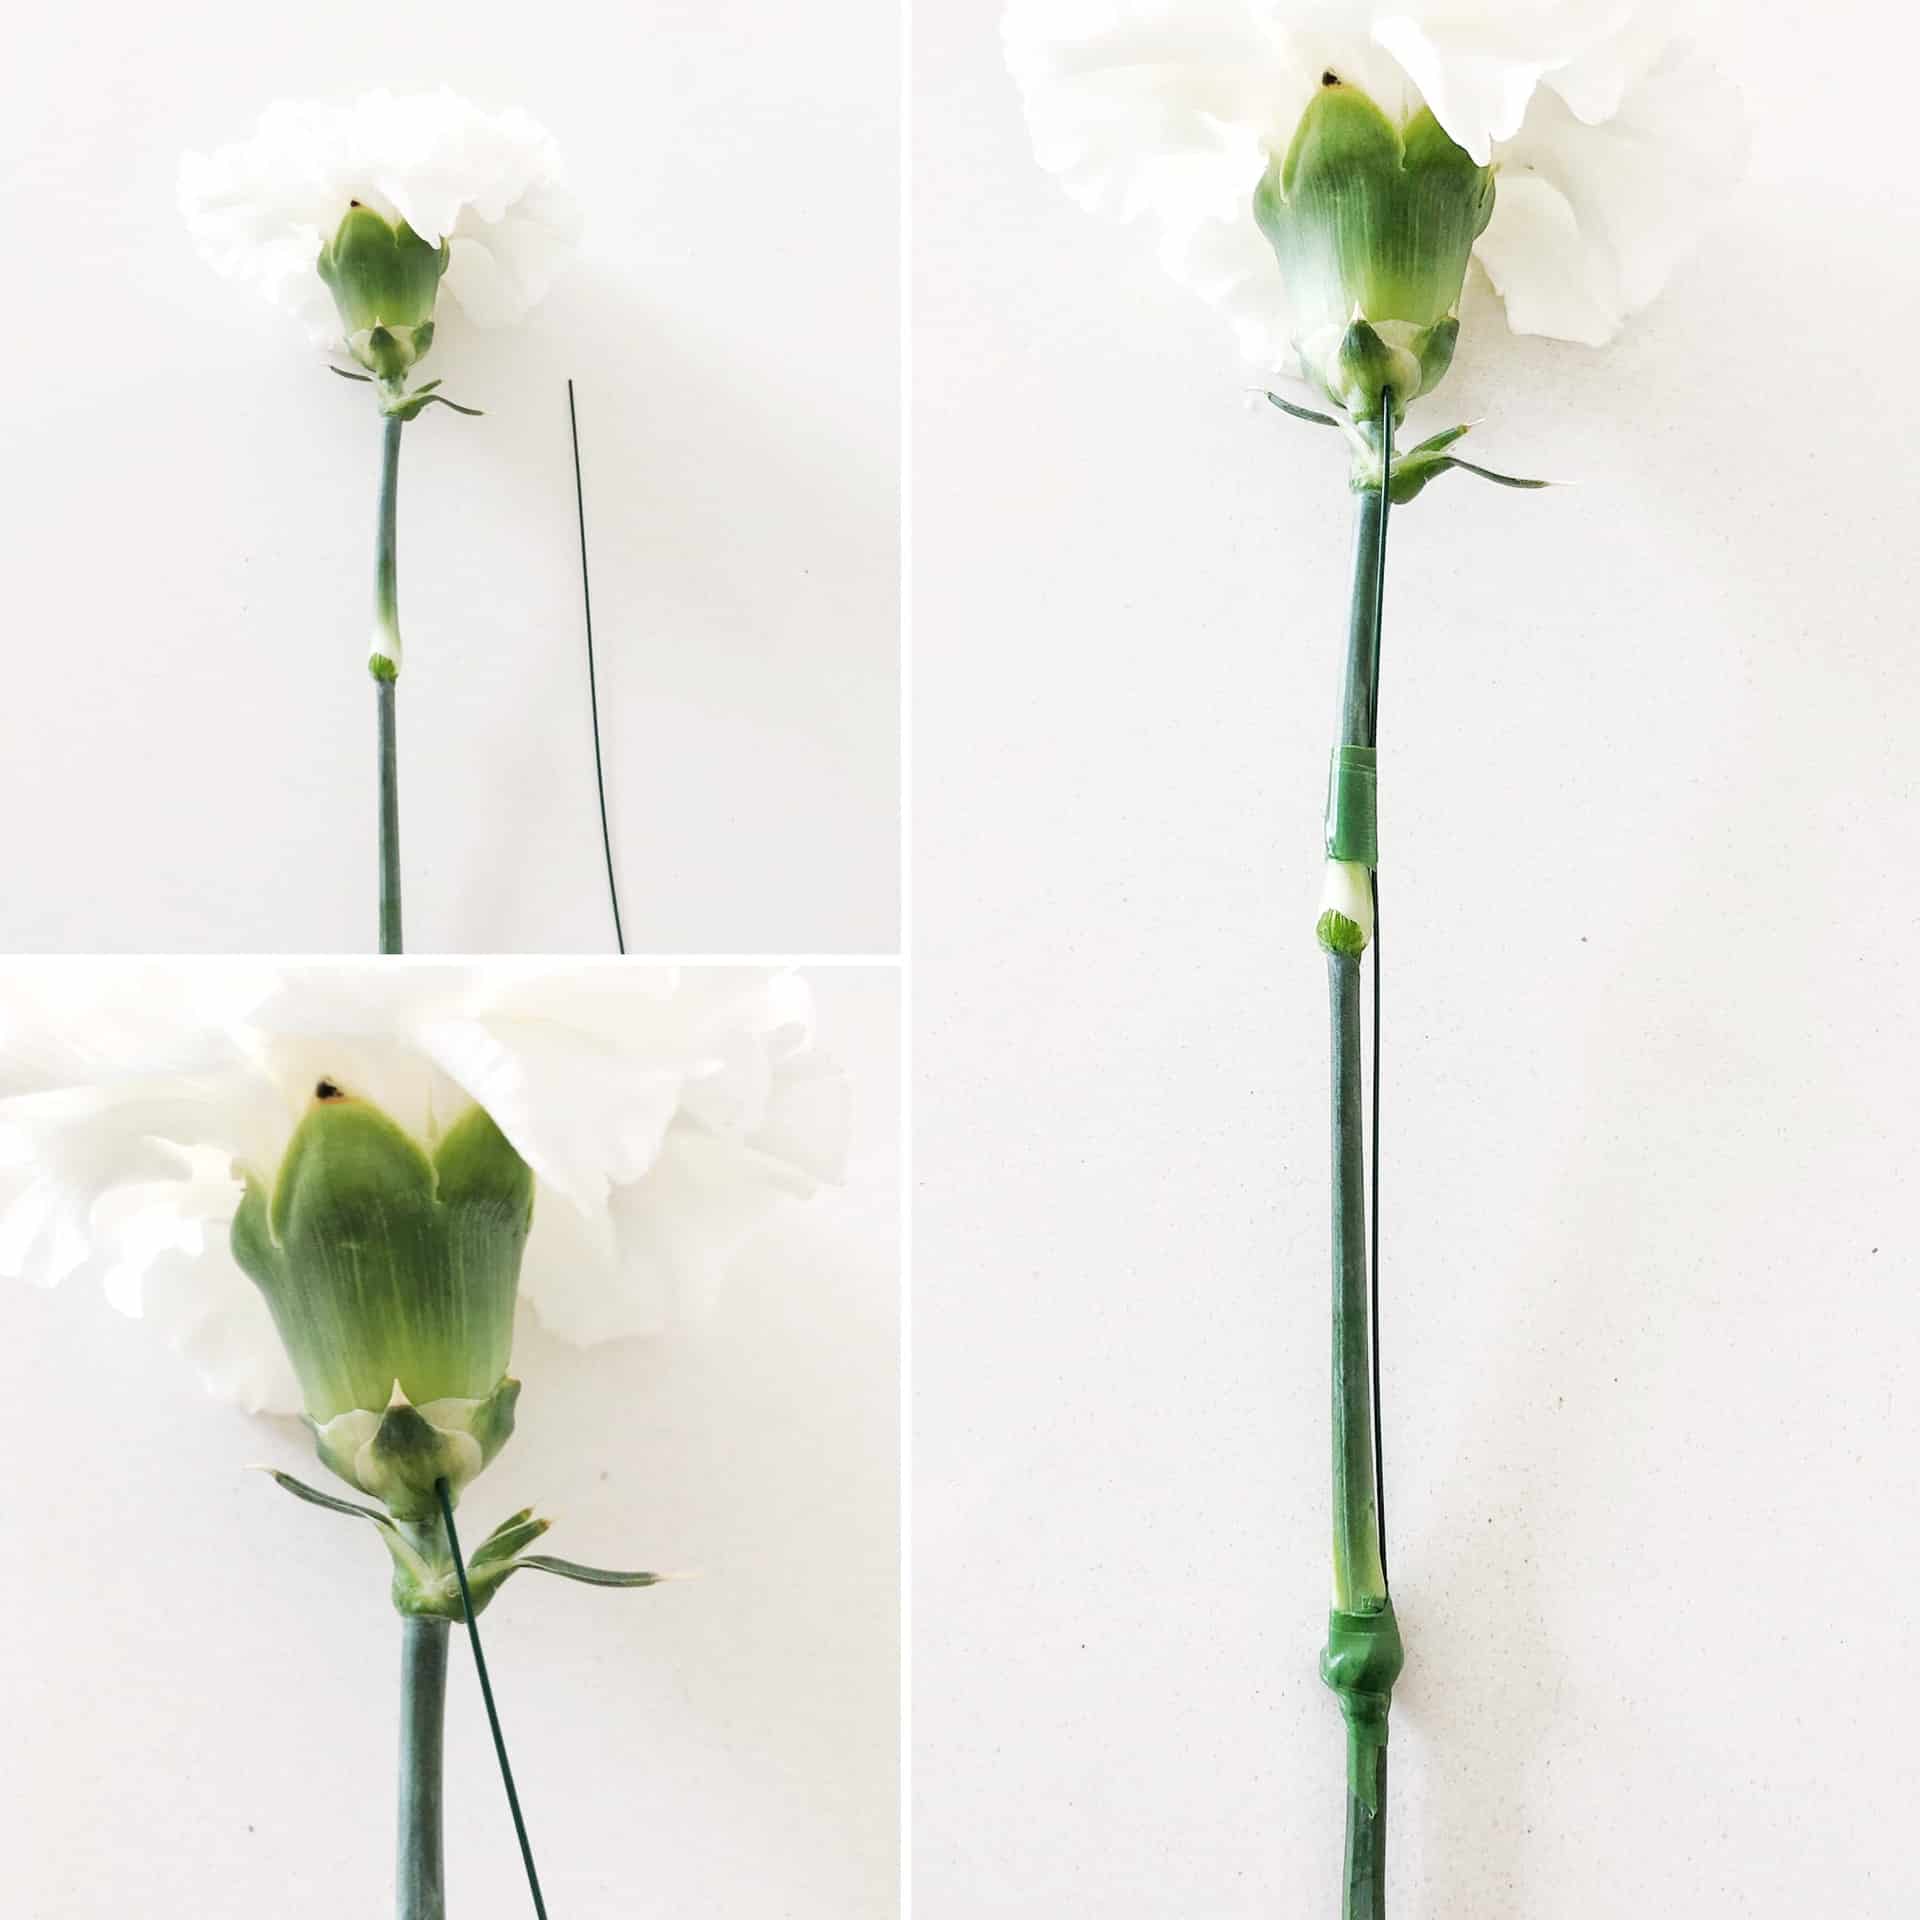
Support Wiring 0.7 – 1.0 Gauge Wire
- Insert the wire into the base of the flower vertically, just enough so that it is firmly in place.
- Run the wire vertically along the stem approximately half way the length.
- Stretch and wind the floral tape to cover the end of the wire and again in the middle of the wire to hold securely.
(Used for Roses, Carnations, Gerberas, Peonies, etc to prevent the heads form drooping and stems from breaking)
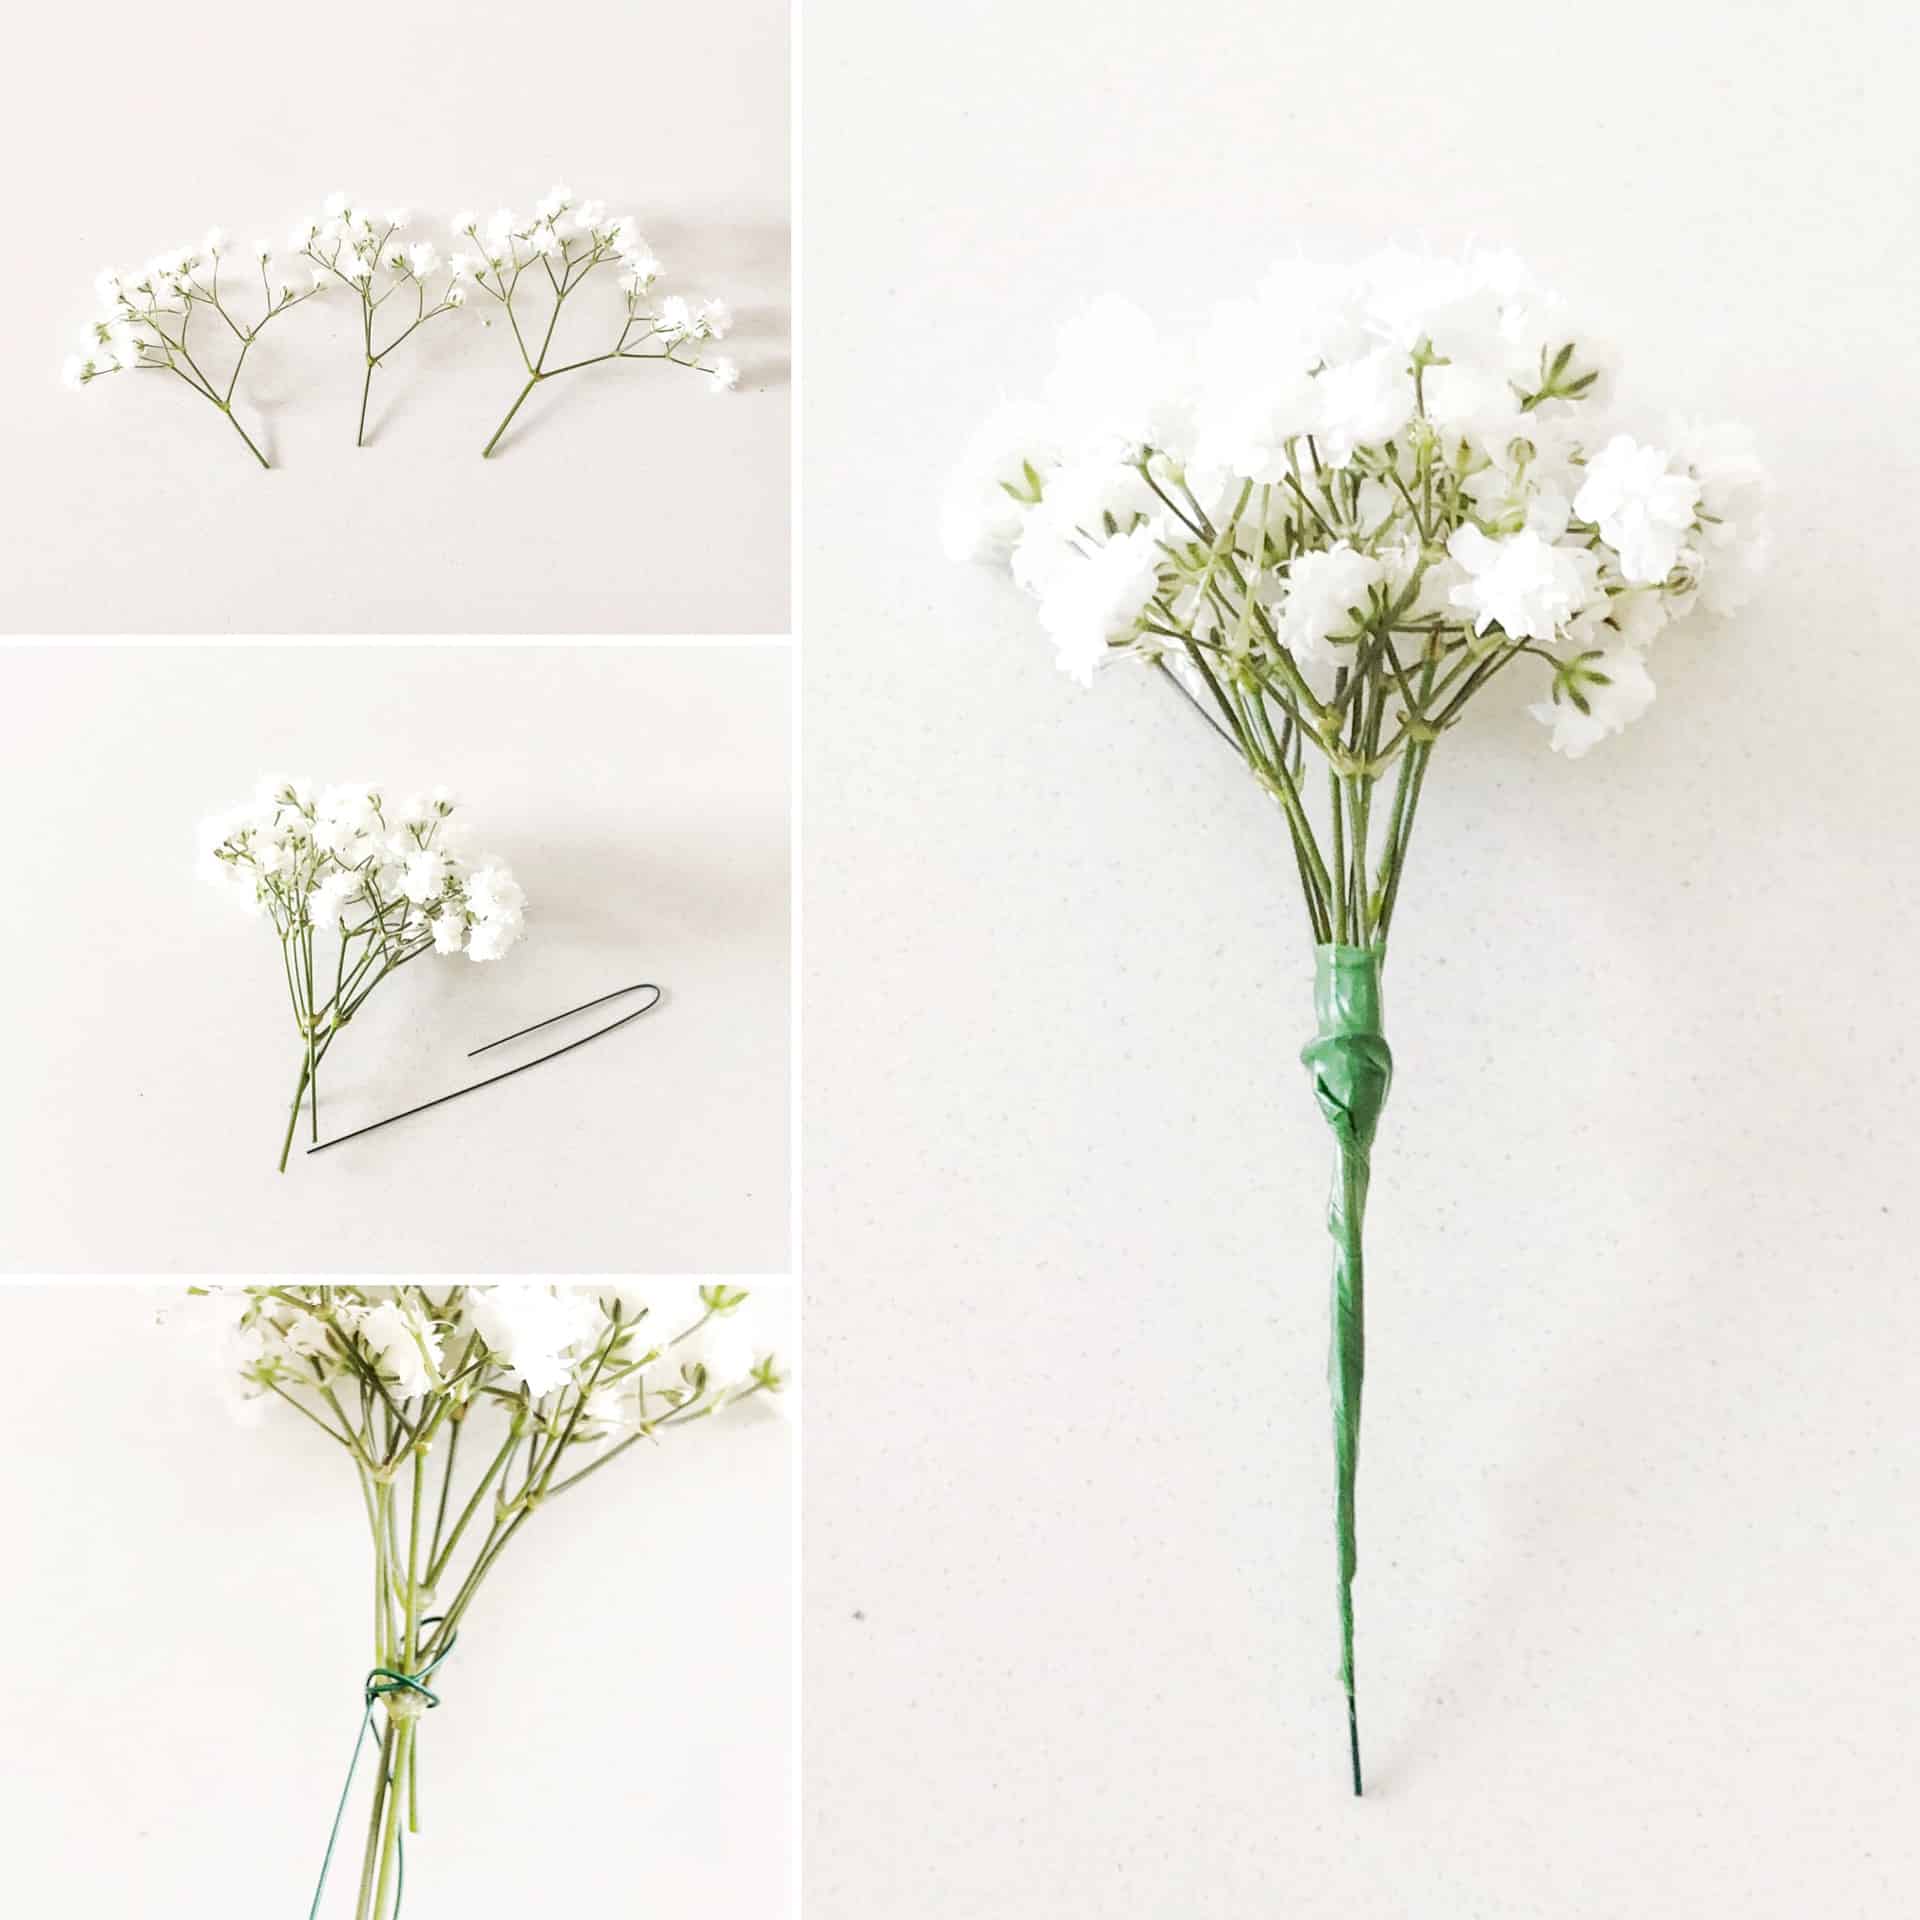
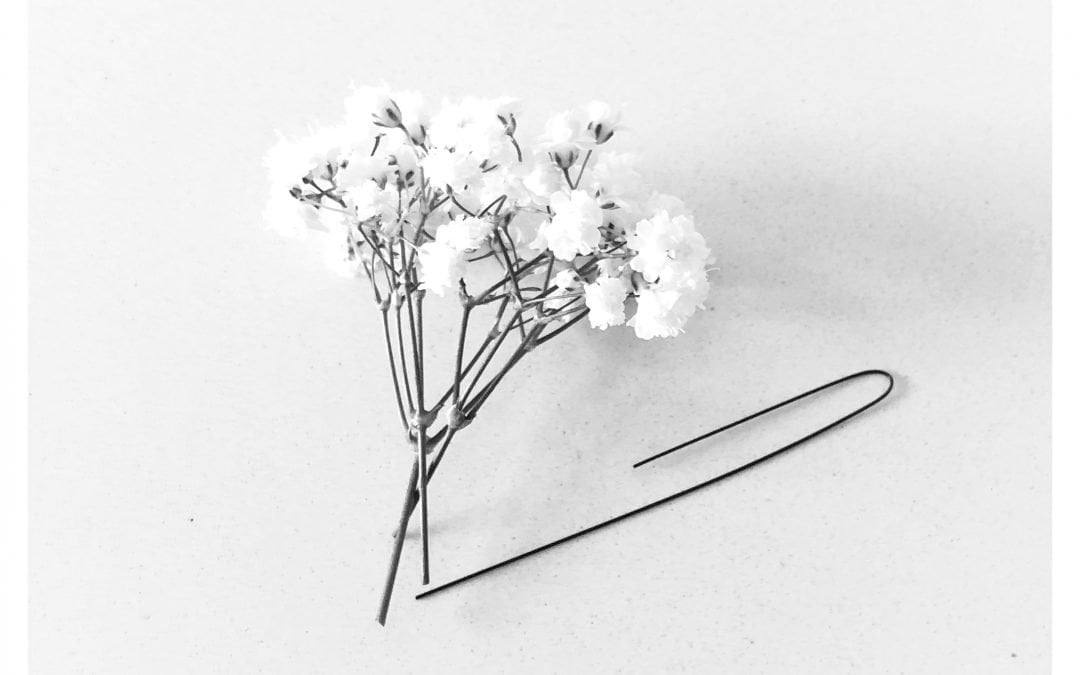
Cluster Wiring (or Binding) 0.5 – 0.7 Gauge Wire
- Cluster 3 -5 short stems approximately 2 cm long together.
- Place stems inside a hairpin wire.
- Wrap the longer end of wire around the stems and shorter end of the wire, securing them together.
- Stretch and wind floral tape of the wire and stems firmly.
(Used to cluster multiple, Delicate stems together, such as Gypsophila, Wax Flowers and some foliages).